
Hardware Wallet Setup Guide: A Step-by-Step Tutorial to Secure Your Crypto
- Satoshi’s Scribe

- Jan 23
- 5 min read
Updated: May 8
This content includes affiliate links for Ledger products. If you purchase through these links, we earn a commission at no extra cost to you. This is not financial advice. Cryptocurrency assets carry high risks, including the risk of losing your entire investment. Please do your own research and make decisions based on your personal risk tolerance.
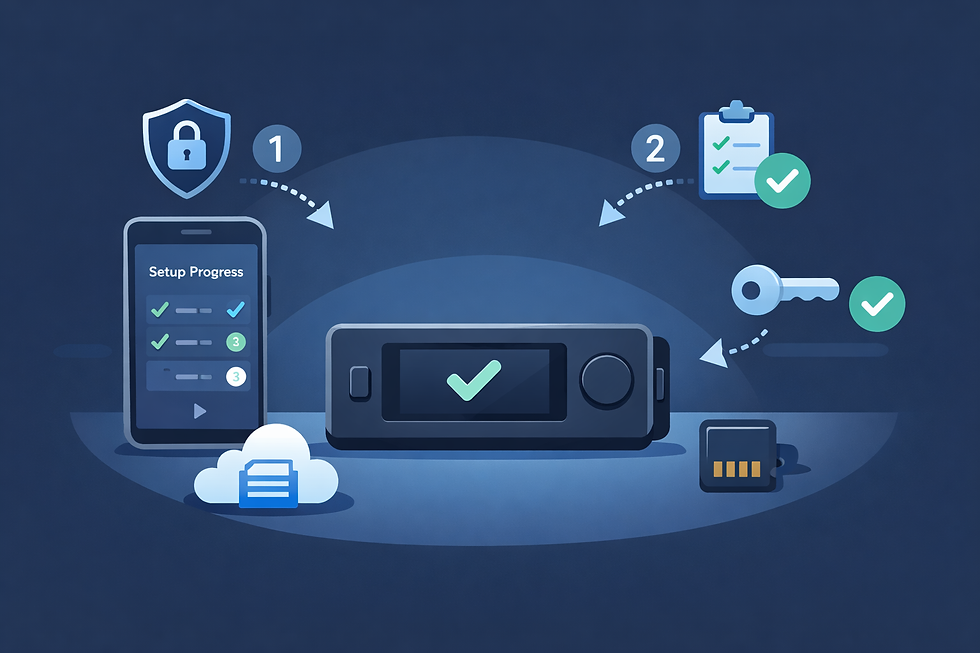
Setting up a hardware wallet correctly is one of the most important steps you can take to protect your crypto. A hardware wallet keeps your private keys offline, but that protection only works if the setup is done properly. Many crypto losses happen not because the wallet failed, but because the setup or backup was rushed.
This hardware wallet setup guide walks you through the entire process from preparation to long-term safety. It is written for beginners and intermediate users who want clear instructions without technical jargon. Follow these steps carefully, and you will set up your wallet with confidence.
Why a Proper Hardware Wallet Setup Matters
A hardware wallet is a secure device, but it does not protect you from mistakes. During setup, the wallet generates a recovery phrase that controls access to your crypto forever. If that phrase is exposed, lost, or stored incorrectly, your funds are at risk.
A proper hardware wallet setup ensures:
Private keys stay offline
The recovery phrase is created securely
Backups are correct and usable
Phishing and scam risks are reduced
Long-term access is protected
This guide focuses on getting these fundamentals right.
Step 1: Prepare Before You Start
Before turning on your hardware wallet, take a few minutes to prepare.
Choose a safe environment
Set up your wallet in a private place. Avoid cameras, screen sharing, or public spaces. Anyone who sees your recovery phrase can steal your crypto.
Use a clean device
Use a trusted computer or phone with updated software. Avoid shared or public computers.
Understand one golden rule
No wallet company, no support agent, and no website will ever ask for your recovery phrase. If anyone does, it is a scam.
Preparation prevents most setup mistakes.
Step 2: Buy Your Hardware Wallet From the Right Place
Your hardware wallet must be genuine.
Buy directly from the official manufacturer's website
Use authorized resellers listed on the official site
Never buy used or second-hand wallets
A tampered device defeats all security before you even begin.
Step 3: Unbox and Inspect the Device
When your wallet arrives:
Check packaging for broken seals
Look for signs of tampering
Confirm all items match the official contents list
If anything looks suspicious, stop and contact official support before proceeding.
Step 4: Power On and Create a New Wallet
Turn on the device and follow the on-screen instructions.
Choose the option to create a new wallet
Do not restore unless you already have a recovery phrase
The device will generate private keys internally
A genuine wallet always requires a full setup on first use.
Step 5: Generate and Write Down the Recovery Phrase
This is the most critical step in this hardware wallet setup guide.
The wallet will display a recovery phrase, usually 12 or 24 words, directly on the device screen.
How to handle the recovery phrase safely
Write the words down by hand
Keep the exact order
Check spelling carefully
Never take photos or screenshots
Never store it digitally
This phrase is the master key to your crypto. Anyone who has it controls your funds.
Step 6: Confirm the Recovery Phrase
Most wallets ask you to confirm the recovery phrase by selecting words in the correct order. This step verifies that your backup is accurate.
Do not skip this step. It ensures you can recover your wallet later if needed.
Step 7: Install the Official Companion App
Most hardware wallets work with a companion app that manages accounts and prepares transactions.
Important safety tips
Download the app only from the official website or app store
Ignore QR codes from emails or packaging
Bookmark the official site for future use
Connect your hardware wallet to the app following the official instructions.
Step 8: Update Firmware if Required
Firmware updates often improve security and compatibility.
Update only through the official app
Do not disconnect the device during updates
Never install firmware from third-party sources
Keeping firmware updated is part of long-term wallet safety.
Step 9: Add Crypto Accounts
Once setup is complete, add accounts for the assets you plan to use, such as Bitcoin, Ethereum, or stablecoins.
This step does not move funds yet. It simply prepares your wallet to receive them.
Step 10: Test With a Small Transaction
Before moving large amounts, always test.
Send a small amount to your new wallet
Verify the receiving address on the device screen
Try sending a small amount back
Testing builds confidence and catches errors early.
Step 11: Long-Term Best Practices After Setup
A hardware wallet is most effective when paired with good habits.
Use a layered wallet approach
Hardware wallet for long-term storage
Hot wallet for small daily use
Burner wallet for testing new apps
Read transaction details carefully
Always check what you are approving on the device screen.
Store backups securely
Consider a metal backup and separate storage locations.
Keep everything updated
Update apps and firmware regularly.
Common Hardware Wallet Setup Mistakes to Avoid
Avoid these common errors that undermine security:
Taking photos of recovery phrases
Storing phrases in cloud services
Sharing phrases with anyone
Buying from unofficial sellers
Rushing setup steps
Skipping test transactions
Most wallet losses come from these mistakes, not device failure.
How Recovery Works if the Wallet Is Lost
Your crypto is not stored on the device. It lives on the blockchain.
If your wallet is lost, stolen, or damaged:
Buy a new hardware wallet from an official source
Choose restore wallet
Enter your recovery phrase directly on the device
Regain access to your funds
This is why accurate backups matter so much.
Why Ledger Signers Are a Strong Choice
Many users choose Ledger signers because they are designed to make setup and recovery clear and safe.
Ledger devices generate recovery phrases on the device, require physical confirmation for transactions, and support a wide range of assets and apps. They are tested by an internal security research team and receive regular updates.
Popular Ledger options include:
Ledger Nano S Plus for beginners and long-term storage
Ledger Nano X for mobile users
Ledger Nano Gen5 for modern Web3 use
Ledger Flex and Ledger Stax for users who want larger screens and easier transaction review
Ledger signers are built around one core idea. Your private keys stay offline and under your control.
If you are looking for a reliable device to follow this hardware wallet setup guide, Ledger is a trusted option used by millions worldwide.
Extra Tips for Maximum Safety
Never enter your recovery phrase into a website
Ignore urgent messages claiming your wallet is compromised
Verify addresses on the device, not just the screen
Keep your setup private and unrecorded
Plan for inheritance or long term access
Security is not about fear. It is about consistency.
Before You Go
A hardware wallet is one of the strongest tools available for protecting crypto, but only if it is set up correctly. This hardware wallet setup guide shows that security comes from careful steps, good habits, and attention to detail.
Take your time. Follow each step. Keep everything offline. Test before committing large funds.
When done properly, a hardware wallet gives you peace of mind that your crypto is protected from hacks, scams, and online threats for years to come.


Comments